Create invoices in QuickBooks Online
Learn how to create and send invoices in QuickBooks Online.
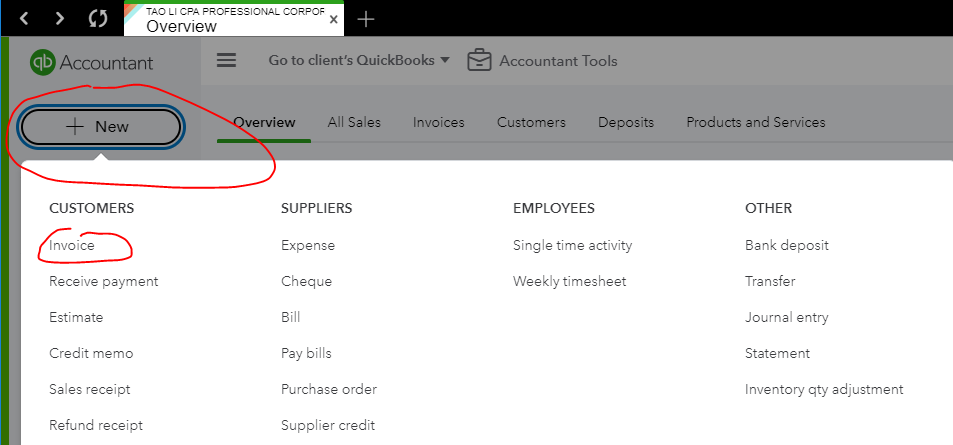
Step 1: Create and send an invoice
Select + New and then Invoice or Send invoice.
From the Customer ▼ dropdown, select a customer. Make sure all of their info is correct, especially their email address.
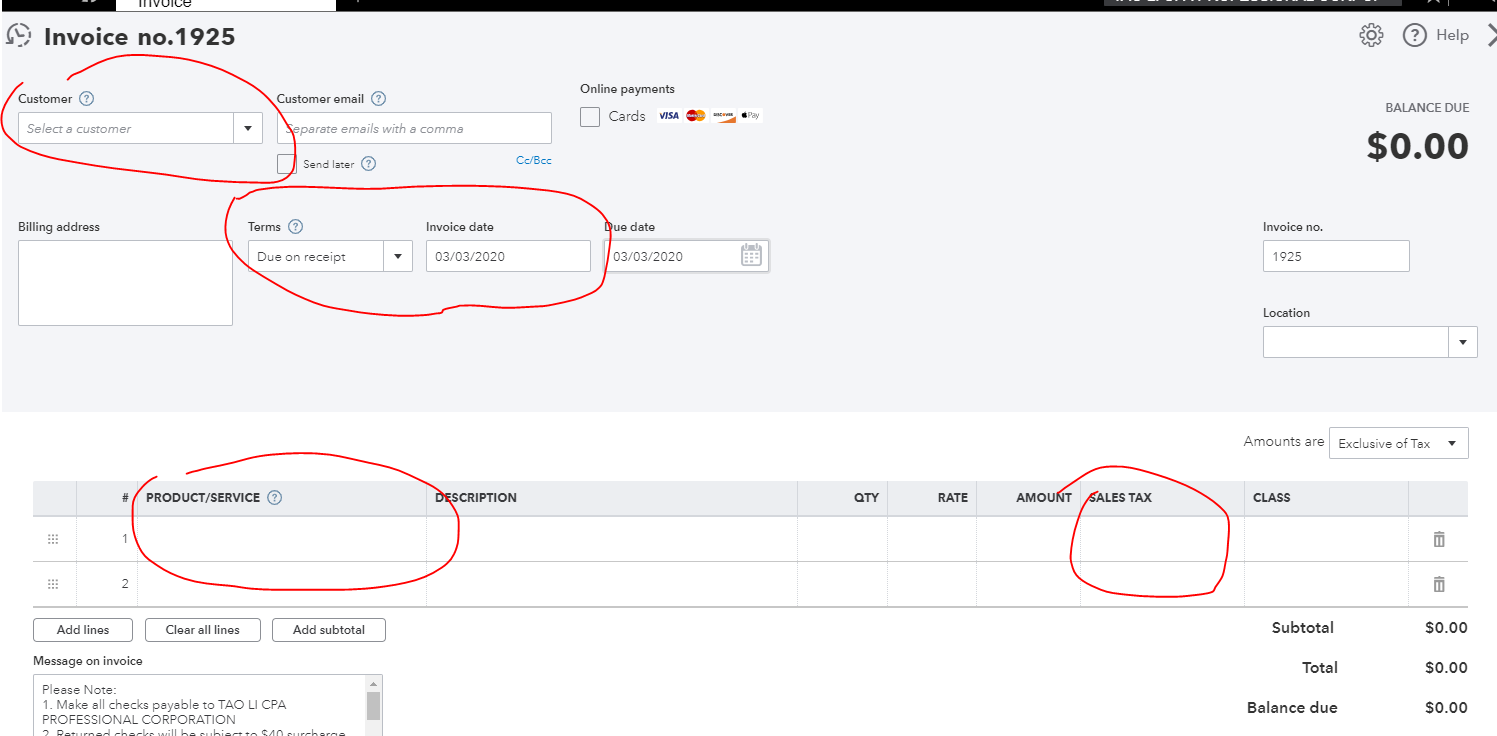
Review the Invoice date. Then from the Terms ▼ dropdown, select the due date. Tip: Net refers to the number of days until the payment is due. The default is 30 days, but you can change the due date if needed.
From the Product/Service column, select a product or service. You can also select +Add new to create a new product or service right from the invoice.
Enter a quantity, rate and change amount if needed.
Select a Sales tax code.
Note: If you see the Flat rate, By hour, or By item options, this means you’re in Business view. Your experience is slightly different. Select Flat rate or By hour for services or By item for products. Then enter the quantity and amount.
When you’re ready to send the invoice, select Save and send. Or, if you’re using QuickBooks EasyStart, select Send.
If you want to send the invoice later, select Save and close. Or, select Record if you’re using QuickBooks EasyStart.
Want to send your customers a paper invoice? Select Print or Preview.
Step 2: Review open invoices
Any time you want to review your invoices, go to the Sales menu and select the All sales tab or Invoices tab. You can also go to the Customers tab and open a customer’s profile to see their invoices.
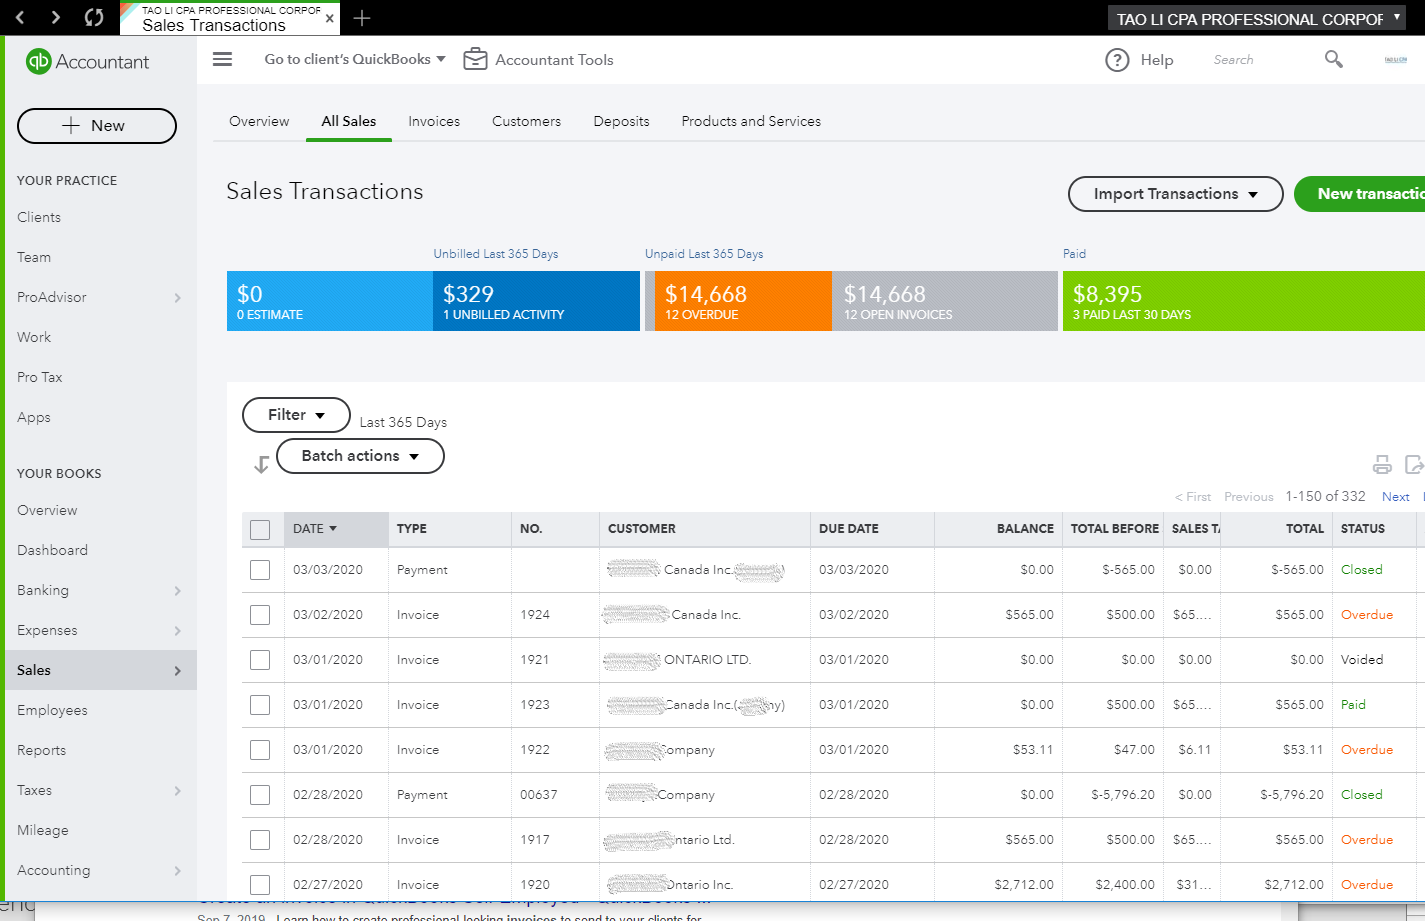
Before you get paid, QuickBooks puts open invoices into your accounts payable account. You’ll see this account on your Balance Sheet and other financial reports.
Step 3: Receive payments for an invoice
If you use an external platform to process payments, you can easily keep track of payments as well. We will discuss the steps to record invoice payments manually in a separate article.
Next Steps: Enhance your invoices
Quickbooks Online can personalize your invoices so you client can easily recognize your invoices. Here’s how to create custom templates.
Project Invoicing:
If you’re a project-based business, you can create progress invoices to request partial payments during a project.